What it is
Quick Blast is a shortcut feature that lets you send a one-time message (Marketing or Transactional) to multiple people quickly. It’s like a lightweight campaign tool optimized for fast, single-shot sends without building a full campaign.
You go through a step-by-step form (Type → Who → What → When → Launch) to configure your message and audience.
Why it’s useful / Value Proposition
-
Speed & ease: It’s the fastest path to launch a one-time message to many contacts without building a full campaign.
-
Compliance built in: By choosing “Marketing” or “Transactional,” it automatically filters recipients based on subscription status so you don’t violate opt-in rules.
-
Flexible audience options: You can paste numbers, pick segments, use external integrated lists (if available), or even “Everyone” (filtered by compliance rules).
-
Preview & test steps: You can validate your settings, test the message, and preview before sending.
-
Automatic naming & record in Campaigns view: Even though it's “quick,” the message shows up in your campaigns list with a default standardized name (which you can override).
Using Quick Blast
From your Voxie account, navigate to the header bar and click the yellow Quick Blast button on the top right near the notifications bell.
![]()
From there, you are brought to the Quick Blast form to launch your message.

Step 1: Type
Here, you are prompted to answer what type of content you are sending to your contacts. This will allow you to automatically target your subscribers for Marketing or Transactional messaging to keep your conversations in compliance with SMS regulatory laws.
- Marketing: The system will only message those contacts that have the Opt-In label under their Marketing Subscriber Status.
- Transactional: The system will only message those contacts that have either the Opt-In or No-Preference label under their Transactional Subscriber Status.
💡 You can find more information about Subscription Status here.
Step 2: Who
In this step, you'll be able to either paste a list of phone numbers or you can pick an already existing audience segment.
Manual Entry: In this scenario, you can copy and paste up to 100 phone numbers. Once entered, you'll be able to verify those numbers, this will see which are mobile vs landline. This feature only accepts US and Canadian phone numbers.

Once numbers are verified, the system will show the results of the verification. The system will:
- Acknowledge the valid numbers, with details between the New + Existing numbers
- Count the invalid numbers, with the ability to correct or delete these numbers
From there, you will be presented with two different options to continue in the process:
- Reset: Will clean up all verification and let you start over, keeping the already entered phone numbers in their previously entered state
- Continue: Will continue with Quick Blast and send to all of the numbers provided
Audience Segment:
When using an audience segment, you can add as many existing segments as you would like to your message.

Once segments are picked, you'll be able to validate the selection and discard segments if necessary.

💡 To edit or create segments, visit the Segments page.
External Lists
This Audience source is only available if you have External Audience builders as CDPs or CRMs integrated with Voxie. They behave exactly like Segments
Everyone:
If Everyone is picked then, all Contacts matching the compliance requirements for the Quick-Blast Type, will be messaged, like:
- Transactional Type: all contacts with the following Transactional Subscription Status will be messaged:
No PreferenceOpted-in
- Marketing Type: all contacts with the following Marketing Subscription Status will be messaged:
Opted-in

Step 3: What
The third step allows you to build the message you are going to send. Like other message-building functions within Voxie, you are able to use all existing features, such as:
 Templates: the ability to use pre-assembled brand standard messages
 Variables: Messages can use inserts that are unique per contact, producing even more targeted and personalized communications.
- Team Custom Attributes: Team level variables that can be inserted in a message, like "open hours", "location", or "brand" name.
- Contact Custom Attributes: Contact level variables that can be inserted in a message. A contact can have up to 50 unique custom attributes, and each of them can be a part of the message (if needed).
- Campaign Name: The name of the current campaign.
- Coupons: If Promotions is enabled on your Instance, and there are available coupons, each message will uniquely assign each coupon to a particular contact. These assignments can be tracked in the Promotions screen.
 Emojis: Insert web standard emojis to provide emphasis in your messages.
 Refresh: Clears out the message.
 File Attached: Voxie supports file attached up to 1 MB of size and the following types as well:
- Images: .jpeg, .png, .gif
- For non-Images the Size Image Limit is 600 KB
- Audio**:** .mp3, .mp4 audio
- Video: .mp4 audio + video
- Text: .csv
- Application: .pdf, .vcf

Important Note: You can see the number of message segments that your copy will use. In this example the characters in the emojis bring the segment count to 5.
Step 4: When
You can decide when this message should go out. You can pick from "Now" which will launch the message immediately after you confirm, or you can pick "Later" which will schedule the message to be sent at the date and time of your choosing.

Make sure that you are mindful of safe sending hours. Safe sending hours are between 8am-9pm in the contact's timezone.
Once your selection is done, click on preview.
Step 5: Launch
In the final step, you'll be able to preview the message, with the attached file (if added), send a Test and/or edit the title of the Campaign.

Summary
In the final screen, you can visualize a summary of your choices from the previous steps, validate them, and edit (if needed) to rectify any issues:

If everything looks good, then you can click on Schedule Message, and the following message will prompt for your confirmation:

You can also send a follow-up message, by clicking here:
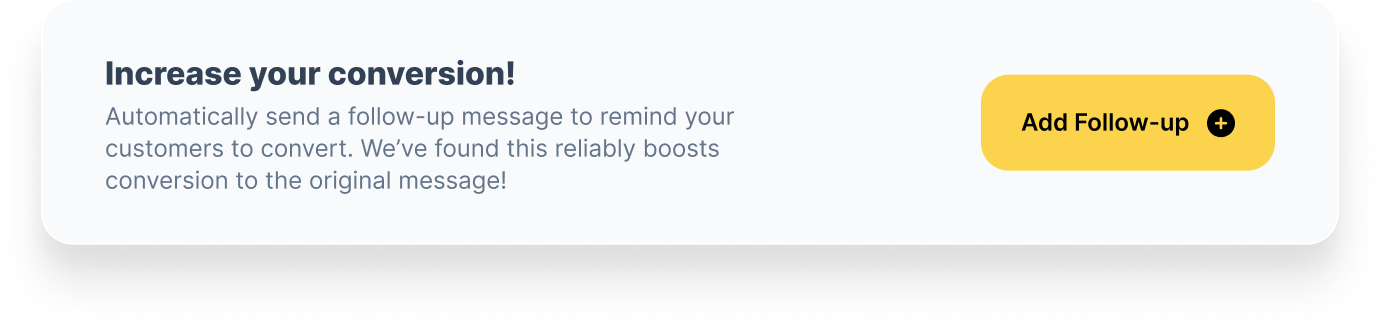
More information in Quick Blast Follow-up section
Campaigns View
In the campaigns view, the Quick Blasts you've configured will take the naming convention as follows unless you edit the name during the building process:
Quick Blast - MM/dd/YYY HH:mm am/pm Time Zone